Sunday, October 9, 2011

Entry #10 week 12: WEBSITE!!! done!! fuuuh...

finally i finish my website, to be honest this my first time to do a website in order and neat one, an organize one.
usually i just edit some page and more page. They usually not even in one folder.
also this is the first time i make a website alone. totally alone, not as a team like when i do my very first website.

actually during the progress i quite struggle with the pages. I think i make too complicated sitemap. I should just make a few sub-menu and focus to make it looks good rather than many sub-menu and messy one. But i can manage to make it finally.

so this is the design of my website:


picture: the splash page in the website

picture: one preview of the website

basically i do the design all using photoshop and make the template using dreamweaver.
for some animation and effect and of course the gallery, i use adobe flash.


picture : image gallery of the main website

the page i love the most in my website are graphic preview page in splash page and image gallery page in main website.
in graphic preview in splash page, i manage to make a masking effect (which is drive me crazy in the process yet very satisfy with the result) and the scroll effect in image gallery menu.

too bad, i put all my work in my external hard drive that i left in my home country.
So all the works and photo i put in my e-portfolio was the one that i grabbed from my personal blog.
which is small an low quality,

but a least i already make my basic own e-portfolio. I just need to update it later when i got home. a feed back from jack make me realize that i actually make 2 website combine together haha... :P but to be honest i prefer my splash page rather than the main website :P

if you want to see my website then just go here
please just don't go inside the website right away there's a lot of clickable things in the white splash page.. :P


Saturday, October 1, 2011

ENTRY #9 week 10: Idea... idea.. GOD i need an inspiration


without realizing it.
it's already week 10. which means it's only 2 weeks more until we collect out project web.
and website is not some thing that you can finish in short time especially when you work alone not as a team.

So I started to collect an design Idea of my website.

1. Photoshop.
today in class we learn to use a slice tool and decide website with photoshop. i mean a whole website :D. I've never known about this . it'll make everything easier a i suppose.
so i decide to make every design in photoshop except for content.
I'll try make the content as a slide show by flash. and edit with dreamweaver of course

2. Splash page :D
i know splash page is good for a complicated website, no a simple website like what i am going to make. yet, splash page is the most beautiful and dynamic that a webpage can be.
so i decided to make one in flash. but i am not sure i can make it in short time but let see wish me like.

3. color and background
white is always the best.. since i can mix with another color.
i will use a white and colorful color for the website.
maybe a color like this.

this is a previous banner that i make for my previous blog.
a bright colour will be really good in white background . i think.
maybe i'll use this banner again for may website

4. cartoon character..
i am thinking to use a cute cartoon illustration in the website.
no time to draw and and colouring again. so i decide to use some old illustration
this one a illustration of me and my friends, drawing by my ex and vectorized by his friend and colored by me.
i'll just edit it and change the money theme into art and technology them..

oh my god so many ideas..
i hope i can finished it on time >.<

here the sitemap plan of the website. maybe i'll edit and put additional page of the website if i got more time left.but this is the basic and main site map

Friday, September 30, 2011

ENTRY #8 week 9: Cyber Duck Versus Localhost , A messy folder Versus Neat one , and an Idea

this week we start to put our website online !!

every person in this class get a space in cdu's scah's server where can be access online (read only) by accessing www.scah.cdu.edu.au/2011.
but to access the server and put our blog into server we can use cyberduck


cyber duck itself not a server. it's just an application that client to connect to a server (in this case scah) . we're lucky since we're student a this class, we got a space in scah server so we can hosting our website for free.
yet, hosting our website offline before posting it always becoming a good idea. to make a local server in my own computer i think localhost will always become my bestfriend <3

again. in this week we learn to make a web template and how manage a website in dream weaver. basically this is what i do with dream weaver.
another website, this one already use template and and table

i struggle a lot to make the table in the center so it'll be suitable for every browser.
and it's also a good idea to make our website in one organize folder. so we will not struggle a lot to change or the link when the website get more complicated. believe me,, *based on true experience :P*

another idea for my final project:
i think i would like to use drop down menu in my website but turn out it's too complicated to make a drop down menu by your own design. so maybe a nice horizontal navigation bar wouldn't hard :)

ENTRY #7 week 8: World Wide Web , HTML, and our first website assignment

as said in the previous lecture. we are going to make our own website for an e-portofolio.
but what is website ?

website which is one of the most popular application in the internet world.do not believe me? then please think back. aren’t we open a website at least once a day. So if you what to know how was this stuff actually born in our world ;)

website was actually found in march 1989 (i can’t imagine same year as me ;) ) by Berners-Lee, an oxford graduated. he applied a proposal called”HyperText and CERN” which consist his planning to make a system which can share many information between psychic researches.

After all website already gives big effect to human civilization. below are a few from thouzands big event in the web development until now:

  1. Domain.. domain.. and domain : in 1983. Remembering 12 digit of number = NO MORE!
  2. 1990 , www is found ! by Berners-Lee team
  3. Yahoo : found by jerry and david in february 1994
  4. Auction in internet : e-bay first auction in 1995
  5. Online ensiklopedia : wikipedia first launch in january 2001
  6. Hidden cam : jenni cam first launch in 1996
  7. Social networking attack : first social networking (friendster) become phenomene
  8. Google : when page meet larry = sucsses searching engine was found 1998
to make a website we can use some language like HTML, CSS, PHP, Java Script etc.
but since we're only required to make a basic website (not a dynamic website). for the assignment and project we were suggested to use HTML.

for assignment we required to make an HTML page without any application with graphical user interface which mean we need to make a basic website page with raw text.
well, no one really remember all HTML tags.. so i got a lot of help for this w3school

and this is my first assignment looks like.


basically i just change the background, cange font and put some colour, put image and put link.
a very simple stuff that you can do with only notepad.
yet it's already a website page :D

amazing, right?

ENTRY #6 week 7: New Lecture , Technology, and Art :D

Welcome to a new start!!

after we finished we with the video editing last week, we finally move on to another project,
which combines technology and art.. of course it's a website :D

i didn't say that the previous project (video editing) isn't a combination of art and technology.. I mean how can you edit a video without a computer (well in this case apple ,, VIVA Steve jobs !) yet i think website is more technical since it's involved programming language and stuff ( well, even we will use dream weaver which allowed us to edit HTML in graphical user interface)

but basically we playing with a programming language , aren't we ?

this week, we have a new lecture and new stuff which it's means another introduction..
it's reminds me i haven't make an introduction in this blog. well, a little bit introduction about me before we talk more about technical stuff wouldn't hurt,right ?

my name is mega oktafiani putri. an very ordinary college girl who struggle her self in such unhumanity world (or to be more specific let’s call it college ROFl~). born in 16 october 1989 with a mistype birth certificate that make my birthday move to 11 october (no wonder i do mistype alot.. see? even my birth certificate is mistype. I wonder if my death certificate will be mistype too :P ). I am really into technology (computer , game , gadget, etc) and art (photography, graphic design, photo editing, animation etc).. which i always think that those two are inseparable... in spite of my bad drawing and no talent things, i really love that those stuff..

okay enough for me,
this week we start to talk and think about our website which is a e-portfolio website.
i feel so stupid because i left most of my creation in my hard drive back in my country.
maybe it's one of advantages of an e-portfolio , it's a dynamic storage. you can access it from anywhere whenever you need it.

Luckily i have my own e-portfolio blog before, but as you can see i never update it again since 2009. it's 2 years ago.
well, at least i'll have something to post in my website later.

maybe it's just reminder for myself to really organize my creation and post it online.
it'll be useful someday.

Saturday, August 27, 2011

ENTRY #5 week 6: ONE WORLD - Technology Make No Distance

Finally this week we finish our project video and show it to the class. Everybody's project are really cool and professional. some video are really god and give some inspiration to me and give me some idea about video editing. Show video even make me think like öh.. why i didn't use this editing technique to my video". It's really a 'full of creative idea' class today.

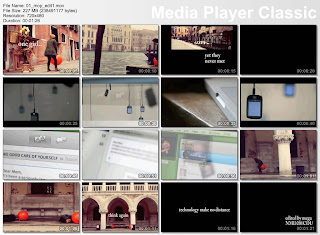
while my video itself can be show as below :


title : One World - Technology Make no Distance
Software: MPEGstreamclip, final cut pro
Method : layering, cutting, effect, key framing, audio editing , etc

basically the idea of my video are making a short movie using mixing some difference clip.
The story line is quite simple. it was about technology connecting people.
The story begin by showing two people, one boy and one girl , who live in the same city yet they never met each other. But by using technology ( email , phone, etc. ), they manage to bump to each other one day.

I was really glad that i could show my video to the whole class. Because of that, i god a lot of feed back about my video to improve a lot things like the title , music, and the length of the video itself.

some feed back are really good for my future works. Like, i must be more careful about the animation and the length of the text because if i am not it'll be no very clear.
The length of every clip in the video also a crucial aspect too. because if it's too long it'll become boring yet if it's too short too, you'll maybe can not deliver your point.The problem is length of the video is quite relative to every person. That's why i think showing your work to a lot of people before published it is a best way to figure out whether your video is already good enough or not.

In the process itself, i quite struggle with apple and final cut pro because all of them are new stuff for me. yet, I quite satisfied with the result and feel happy for my self since finally i can manage to operate another new software :)

you can get my video works here :

vimeo

or here

abc pool


Saturday, August 20, 2011

ENTRY #4 week 5: Ready For Final Video ?


"WEEK 4
preview: in this week, we are learning how to put effect and tittle , also how to edit audio

soft ware : final cut pro


technique : filter effect, title , audio editing using pen tool
"


There are so many editing method that we learn this week. I think it's because next week, which is week 6, is the due date of our final final video. So this week we learn some basic stuff we need for final video editing which is filter effect, title and audio editing.

for filter effect, final cut pro already provide some effect that we can simply put in the clip we want. effect can be found in effect tab and we can configure the effect as we like. The effect tab can be shown as screen shoot below :

personally, i like glowing effect yet i decide to use fish eye and earthquake effect for my weekly editing assignment since i think these effect are the most suitable for my source video.

The second stuff we learn this week is how to put some tittle in the video. final cut pro already provide some animation template for text like typewriter , crawl , scroll etc. yet we can make animation for the tittle by our self by using the motion tab and key framing.
For my final video, i use many text since i make a short movie. text / title make my movie more understandable. I choose to use typewriter text for the beginning of my video, and the rest i prefer to make my own text movement by key framing since i want the movement of the text follow the animation that already in the video.

The last stuff we learn this week is audio editing. we can configure the 'opacity' (db) of the audio using pen tool.


Thursday, August 11, 2011

ENTR #3 week 4 : the key frame editting

"WEEK 4
preview: in this week, we are learning how to use key frame in video editing

soft ware : final cut pro


technique : key frame editing
"


in this week, we basically learning about how to use a key frame in video editing. as we all know , video are actually a continues image or frame.

final cut pro actually allow us to make editing use key frame that we can decide any position, size, opacity and safe it in one key frame and another change in another key frame. Final cut pro will recognize this changes and make an automatic motion/ animation of this. This key frame editing can be done using a motion tab as shown below:


in my own opinion, i really like this type of editing since we can make our on movement , animation or effect as we like. So wen can express our idea. with this technique, i can make an animation of the tittle and the video as well. Since I have once learning making 2d animation using adobe flash, which is the idea of key framing basically the same, I am quite understand this technique very well.

For the assignment this week, we are asked to make some motion of video where. we make 9 video appear one by one which is finally it was 3x3 video in the final screen.
I basically edit the size, position, rotate and crop the video to make the effect of the movement. To be short, my editing for the assignment :


here the screenshot of the final result :


Friday, August 5, 2011

ENTRY #2 week 3 : transition effect


"week 3
preview : this week we are learning about making a transition using final cut pro.

software : final cut pro

technique : transition template, opacity changing using pen tool"


in week 3, we are studying to make a transition effect. transition effect is quite important in video editing since it will make a movement from one clip to another clip more natural.
in this week, i try to make some video transition. there are several way to make a video transition.

1. we can manually make the transition using some tool (eg : using some opacity effect etc)
2. we can simply using transition template that already provide by final cut pro.

due to the assignment week 4 , we have to make a cross dissolve , fade in and fade out effect.
i learn how to make cross dissolve effect using pen tool. by using pen tool at the end of the clip, we can change the opacity to video gradually so it's look like a fade in into black effect. then using the same method, i increase the opacity of the clip gradually so that i can get fade out from dark effect.
if i combine this two method together in the middle of the clip, i can simply get cross dissolve effect.


picture : editing using transition template with final cut pro

for the assignment , i decide to using transition template that already being provided by final cut pro. Final cut pro provide a lot of transition effect that can be access from "effect" tab. we're also can simply put some effect that we will use often into 'favorite' folder so it'll be cut our time for searching.
for fade in out fade out effect, we can simply use fade in and fade out template, yet i decide to make it use cross dissolve template by making a blank space in the middle of transition.

For this week, i am start to get used to final cut pro and apple as well and manage to complete assigment 2 :)

Thursday, July 28, 2011

ENTRY #1 Week 2 : the beginning

" week 2
preview : this week we are learning more about common creative and some site to share our creative work or searching new inspiration for our new work. Also we learn about how to convert our video and about the size and codec of video. at the end we are given a chance to learn basic editing in final cut pro.

website : http://pool.abc.net.au/ ; http://vimeo.com/

software : mpeg streamclip ; final cut pro ; adobe premiere (only me)

technique : converting , cutting , vertical editing "


this is the second week of my class NMD201, at the beginning we shared ideas in my mind about how my final video will be. At first, i am thinking to make some music video with animation, like a classic animation one.The story line will be a love story and full of dancing and singing.yet after searching for source video. i found it really difficult to find a suitable video.so after considering a bit more. I decide to change my final video theme to technology.
I haven't decided the title yet. The story line will show how technology connecting people all offer the world and make distance has no meaning.

after searching some cool video in vimeo.com

picture : vimeo.com 's homepage

this website have a lot of creative video made wonderful artist who doesn't mind to share their artwork. i choose some creative common licensed video, because it's means the artist wouldn't mind if i use their art works.

then i convert it into same codec and same size in order to make it more easier when i edit it.
so this is what i do with the mpeg streamclip. in this case i use the windows version since my computer isn't apple . so this is what i do


the i am doing my first editing assignment which is cutting and vertical editing. since my computer lab's account haven't active yet and i don't have any final cut pro in my personal computerso i decide to do my assignment using adobe premiere cs3.

picture : editing process

since adobe premiere cs3 not provide apple video as output format so i must convert it again with mpeg streampclip.

here the screen shoot of first editing assignment :


title : technology make no distance
software : adobe premiere cs 3, mpeg stream clip
technique : cutting, sizing video, unlink video and audio,
vertical editing, horizontal editing etc